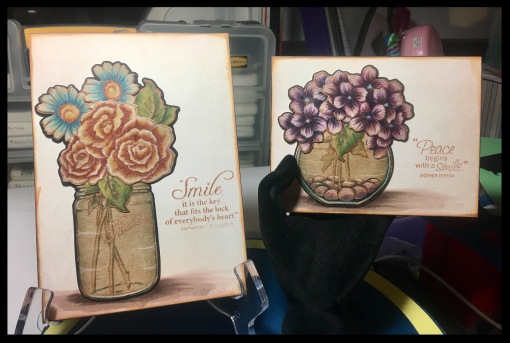
I got out the kraft paper and played. I’m trying to figure out colors and how they work on the different surface. I LOVE how my lighter colored pencils look on it. I also need to figure out if copics are worth using on it. Over all, it turned out okay.
I took a picture of the process from beginning to end. It was fun to see where this project would lead. I didn’t have a plan when I started out. I just wanted to color 🙂
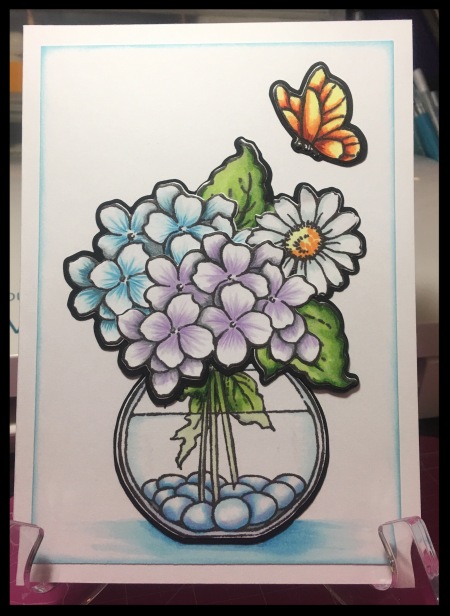
I started out by stamping the images on kraft paper in brown ink. I used one of my brown copic markers to add shading in before I started using colors.

After I finished with the markers, I went in and added details – light and dark – with my pencils.

Close up of the roses after adding pencils on top of copics.

Close up of the hydrangeas one finished off with the white pencils, the other has the darker colors of pencils added but is still waiting on the white.

Whole sheet after going over the copics with pencils.

After I had everything colored, I used the coordinating dies and cut the pieces out and put them together in a way that made me happy 🙂 After that, I put them on my pixscan mat and used that feature to load the images into my Silhouette work space. I can’t get my pixscan mat to actually work for cutting things out, but I CAN use it to make mats for stamped images, which is what I did 🙂

Once in the Silhouette workspace, I created the card sizes I liked for each arrangement and added a pattern/digital paper I bought from the Silhouette Design Store the other day while taking advantage of their 50% off sale 🙂 From there, I did a print & cut for the card front, cut out the black mats for the floral arrangements and assembled the cards. Then I stamped the sentiments on the front.
Thanks for stopping by
xoxoxoxoxo
***floral arrangement stamps with coordinating dies are by Stampendous. The sentiment stamps are from a set by Fiskars.


 I’ve been working on a pretty big project this week, but still found a moment to play a little and make a card.