That Time I Made Myself Feel Better With Paper

16 07 2022

There’s a lot of sad in the world right now. From world events, to national, to local, and right down to the people in our lives.

And I’m an emotional sponge. I soak in emotions. The easy emotions get released pretty easily. The laughter and smiles, that’s the easy stuff.

The hard ones…those are the emotions I keep in. I hold those close because I don’t WANT to give them to others. I don’t WANT others to feel those same things. So I keep them. I process them. I deal with them.

One of the ways I deal with them is art. But I don’t keep the art. The process and the thought behind the art is where the healing is for me, but that’s not the end of it. The end of that dealing with and healing from comes when I find the person that work belongs to. Sometimes it’s easy, if someone has been on my mind. Sometimes I have to wait and see who comes my way. But every single time I’ve been able to do something like that for someone, that’s really what healed my soul and filled my heart.

My therapist didn’t understand at first when she asked me what I did for ME. The answer is, I make things for someone else. And even if it didn’t fit her idea of what that meant, she realized that it worked for me.

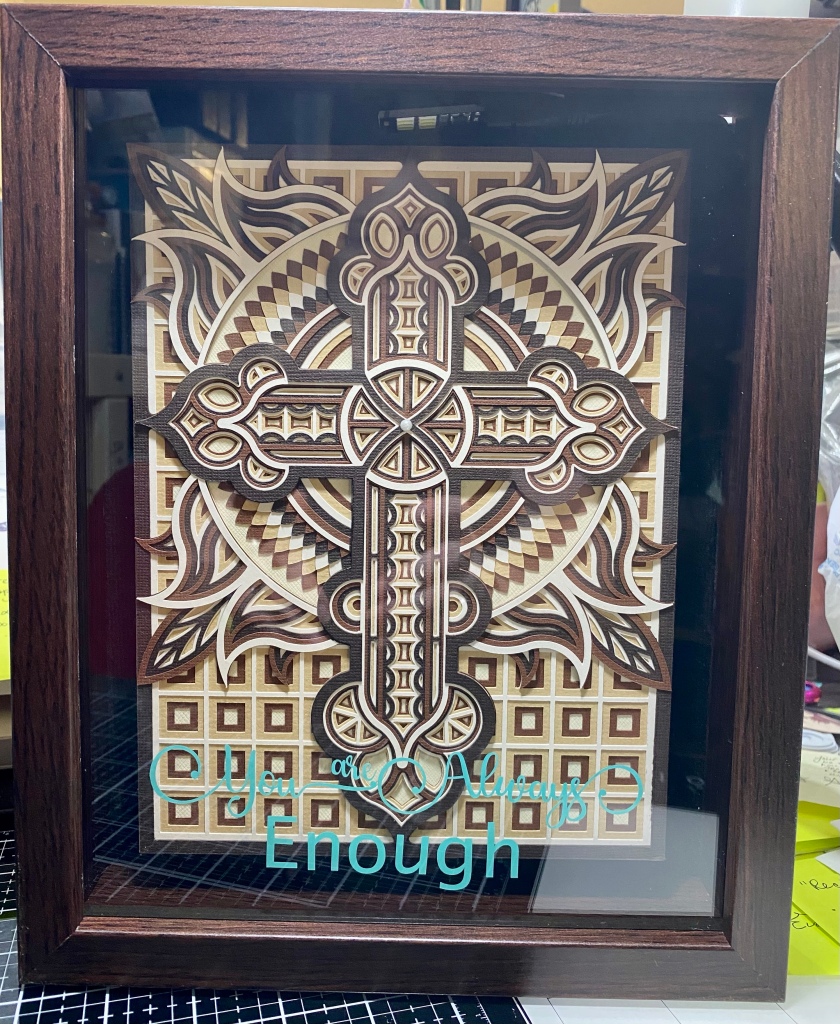
So this last week I spent some time playing with paper because I needed to feel better. And I had a very specific project in mind. I needed the message it created. It didn’t come out exactly like I hoped, but I use the good stuff and once it was in place, that was it, lol.

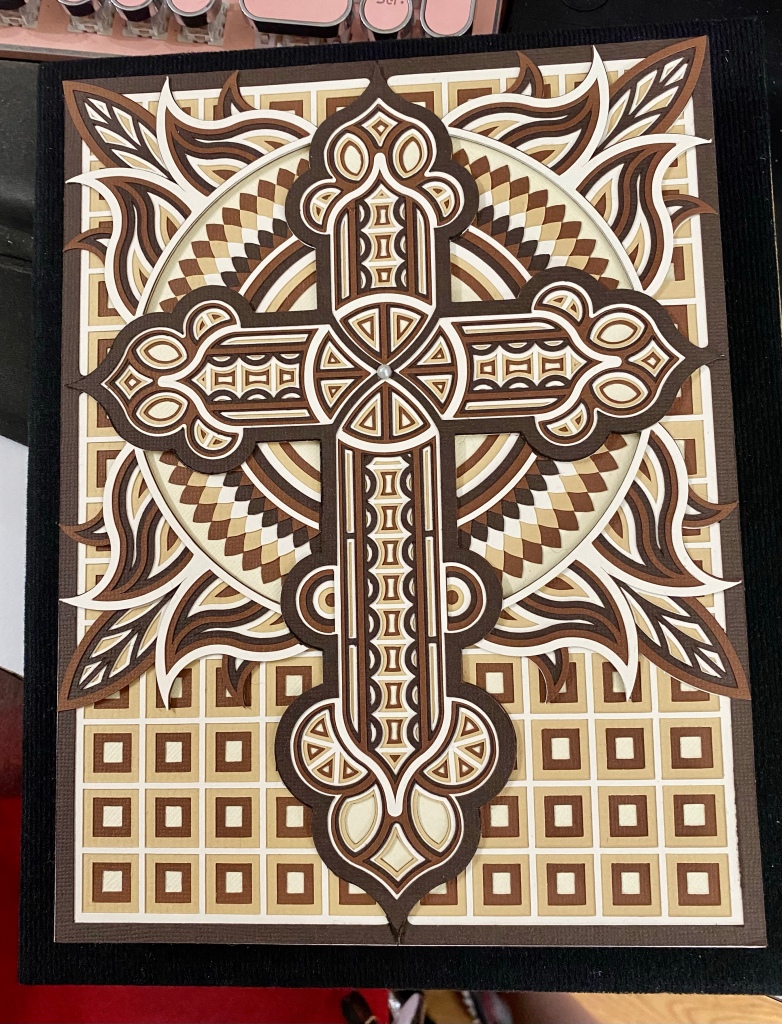
The design took eight layers of paper to complete. I fell in love with the design right off the bat, and I absolutely love the colors and how they came out. It was tricky trying to get it to look like I wanted it to in the shadow box, but I got it figured out. The only part I’m not too keen on is the wording. I needed to use a lighter color of vinyl, but like I said, this stuff isn’t coming off easily lol.

Anyway, the words say, “You are Always Enough” I just wish I’d done it in white 🙂
Here it is, out of the shadow box, which takes the glare off of it. The designer did a beautiful job and this file was so nice to work with 🙂
Thanks for stopping by! We’re happy to see you 🙂

XOXOXO

Alta


That Time I Made a Flower Pail Box Card

25 06 2021

One of my favorite things to do is play with paper. I like making it dimensional with color and design. I’m not skilled enough to design something that will be 3D once all the pieces are assembled, so luckily there are places like

SVG Cuts who has some amazing files to play with. I worked with this one, Flower Pail Box Card for this project. If you don’t already know, one of the great things about box cards, is that they fold flat-ish for mailing, then they can be popped open for display, like you see here 🙂 At the tallest point, this card is about 9 inches, and about 3 inches across when open. When folded flat, it’s about 4 inches across the bottom.

The leaves and flowers were cut out of white paper. Then I used markers and pencils to color them. Yes, I could have made this project easier and less time consuming by just cutting them out on colored card stock, but like I said, I like to add dimension through color 🙂

After I cut out and colored everything, I assembled it. I have a nice envelope and I’ll design an address “label”, print it, then cut it out so the card can be sent.

Thanks for stopping by!

XOXOXO


That Time I Played With Paper Again ❤️

23 05 2021

If you scroll through my last few years of blog posts, you’ll see they’re mostly dominated by topics like autism and service dogs; by foster care and adoption.

If you go back further, you’ll see paper projects, but it’s been a while.

But I got to play this week – yay!

I made a rose /vase box card. There are things I’m not happy with, but I’m rusty so we’re just going to go with it lol

I used this file from the Silhouette Design Store.

I cut out the pieces on my machine, and because I’m extra, I hand colored them with my markers and colored pencils.

The beginning of the flower buds

The finished flower buds

The leaves and stems still on the paper

I like to color things while they’re still on the cutting mat. I don’t have to be as precise, I don’t loose anything, and I have better control of the paper (small things are hard to hold).

The leaves off the cutting mat. You can see the difference between adding colors to the cardstock and leaving it as is.

The finished card.

I had fun playing with paper and colors again. I hope it happens again sooner rather than later, but there’s a lot of other things to focus on right now, so we’ll see ❤️

Thanks for stopping by!

XOXOXO


That Time I Made a Topiary Out of Paper

22 03 2019

As mentioned in a few posts before, the autism center my boys use is amazing. Most of the work on this project was done there. I cut out everything at home, then colored, shaped, and assembled most of it at the center. The topiary is from the kit Thank You For the Music at SVG cuts.

This is kind of picture intensive, so please be patient with me. There were a lot of components.

I took pictures of some of the process. I’m always amazed I can start with flat pieces of paper and make something substantial and dimensional. So I included pics for other people who might feel the same way 🙂

First, the focal points – the flowers. There’s two types. The main flowers and the fillers. Each main flower has 5 parts. I cut them out of blue paper, then added white to the centers, dark blue to the edges, then blended with a shade of blue somewhere between the color of the paper and the dark blue. I believe there were 32 big flowers.

I wanted a fuller topiary, so I used more filler flowers than called for. I used the same process of coloring them as I did for the blue flowers, just different colors.


I also wanted to add clovers and leaves to the base. The clovers are from the Springtime Box Cards kit at SVG Cuts. The leaves are from the pumpkin in the Harvest Sunset Kit, also from SVG Cuts.

I started with white paper  and colored the clovers and leaves the colors I needed them. I used a mix of ink and colored pencils.


And I just HAD to have a hummingbird. And wouldn’t you know it, SVG Cuts has one or those, too! This one is from their Hummingbird Box Card. Instead of cutting out different colors of paper, I cut all the pieces out in white, then colored the individual pieces before assembling. I made a mirror copy that I used to sandwich a wire between so I could make it hover by the topiary.


So those are the elements 🙂 Here’s some pics of the finished product. Thanks to my daughter who helped me get the pics 🙂

The clover.


Craft Project 2

The topiary and the hummingbird.

Craft Project 3

The whole topiary

Craft Project 5

And the card. I used a kit in my Craft Artist collection and designed this card. The flowers weren’t colored, which I LOVE because it allows me to color them 🙂 I used a combination of copics and colored pencils for the flowers on the card.

Craft Project 6


Valentine’s Day Clock

22 03 2019

So this is a little late, but if you read the previous post, you’ll understand why 🙂

My husband and I have a running joke about when it’s time to leave work. He’s a great worker and has pulled all nighters before, when necessary. He also works with people from different time zones. This means that sometimes he’s on a call or working on a project for someone after our “office hours” are over either because the job has to be finished, or he loses track of time.

So I made him a clock. And a card, because Valentine’s Day.

And of course, it’s out of paper 🙂

Front view

img_3933

Side (my husband used to live in France, so I wanted to incorporate that)

img_3949
The clock file is from Dreaming Tree. I blinged out the 5 as a reminder to my husband that I miss him and it’s time to come home 😉

Thanks for stopping by!

xoxoxo


I Still Play With Paper, Too

30 07 2018

I posted a lot of vinyl projects today, but I still play with paper, too 🙂 Here’s a gift set of cards all tucked away in a cute little purse bag.

Craft Project 8

My husband needed to congratulate a friend of his on a pretty big accomplishment, so I made this for him to use.

Craft Project 6

both 3D projects are from SVG Cuts.

Thanks for stopping by!

xoxo


It’s Almost Valentine’s Day

12 02 2017

I’ve been busy this weekend making some valentine projects – yay!

  1. The corset purse  with little roses embossed on the white is from the Silhouette Store.
  2. The bon bon gift box (the top comes off) is from SVG Cuts.
  3. And the cute little Valentine card for my son’s class is also from the Silhouette store, as is the digital paper design. This was a print & cut project 🙂

I hope you’re set for Valentine’s day, whether it’s extravagant or simple, it doesn’t matter. What matters is you’re with loved ones.

Thanks for stopping by 🙂


Feelin’ It!

4 02 2017

hello-light-houseSo I got a title change for that last project and it flowed and I was happy with how it turned out.

My reward for being an adult? Coloring.

I used the stamp set Down by the Seaside by Inkadinkado. I went a little old school with embossing powders, but used a stamp aligning tool I have (that isn’t really meant for that, but works wonderfully) and markers to layer color on the stamp, then press it into the paper. My last layer of ink was a clear versamark. I applied clear embossing powder to the image and heated it up. If you’ve played with this before, you know it effectively masks the area you’ve covered, which in this card is everything I colored. This allowed me to sponge in the sky without messing up the coloring too much. After that, I embossed my greeting in white, then  finished assembling my card.

Hopefully you got to do something fun today, too.

Thanks for stopping by! XOXOXO


Fairy Cottage

3 02 2017

fairy-house-for-posting-2Have I mentioned how much I love 3D?

Here’s another house. I’ve made this one before, but decorated differently because I was doing a winter theme. With this one, I’m trying to urge spring to get here quicker 🙂

This and the Victorian House in the previous post, and another house posted further down are for a silent auction at my kids’ school. It will be interesting to see what the interest in something like this is. This is an SVG Cuts file and you can find all the fun here.

Thanks for stopping by

xoxox


Victorian Row House – in Paper

1 02 2017

img_0963I have fallen in LOVE with 3D paper projects.

This was part of the Parkside Row kit from SVG Cuts. If you’re interested, you can find out more about this fabulous kit here.

I googled Painted Ladies (because somehow I remembered this random name) and used those as inspiration for color and decoration. I modified a few things, used embossing folders (have I mentioned I really like texture, too?) ink, and markers.

Thanks for stopping by 🙂