Autism Bag of Awesome

24 08 2018

It’s awesome, not because of what it looks like, but like most good things, what’s inside makes the difference.

My 2yo son has therapy five days a week and we’re seeing amazing results. But to meet the time demands, he has a team of therapists, not just one.

His time is split between the autism center and home. I absolutely LOVE that he can receive therapy in multiple environments. He has different needs in different environments – something we all have in common.

But one of the tricky parts of having multiple therapists and multiple locations, is how to make sure the data tracking and the tools are consistent. That’s where his notebook comes in. And that’s where this bag comes in.

Basically, the notebook stays with my kiddo, which means I’m taking it home and bringing it back to the center during the week, which I’m absolutely happy to do, but my hands are kind of full sometimes.

So I bought a bag…

And then I decorated it πŸ™‚

Thanks for stopping by!

Xoxo


That Time My Friend’s Son Got Married and I Vinyled a Few Things

20 04 2018

So. Yeah. Weddings and vinyl go together like peas and a trash can, right?

Well, maybe not all the time, but I have a heat press and every special occasion calls for vinyl πŸ˜‰

For years I’ve loved the idea of personalized gifts for weddings. It’s usually a set of thank you cards I try to match to the invitation or announcement some how and a cute little bag to hold them.

But I’ve wanted to do more and I had a chance to this week πŸ™‚

So, the gift contains a dozen thank you cards with envelopes in a box. There’s a little surprise under the cards πŸ™‚

Personalized towels – there’s three. I pressed them first, trying to create crisper folds, but I think next time I may wash them first and just start from scratch. I used simple black HTV for the towels and the wreath file from the Silhouette Design Store.

And I made the box for the gifts to fit in using a file from SVG Cuts.

And everything together.

img_4789

And laying on top inside the box is our card to them. I designed the card based on a beautiful die I saw a few months ago. The butterfly itself is a separate file I purchased from the Silhouette Design Store and incorporated into the card design.

Thanks for stopping by!

Xoxo

Links to items used in the project:

Wreath file, Cube Box, Card Box, Butterfly


That Time My Father-in-law Turned 90

2 04 2018

Yes, 90! Amazing! His mom lived until she was 102 or 103, so we’ll see what happens πŸ™‚

But when someone turns 90, you gotta have something good because odds are they’ve seen almost everything.

So I put together a gift set for him πŸ™‚

Here he is with his cake – isn’t he handsome? Sorry girls, he’s taken.

Here’s the packaged gift set

img_4622

And unpacked with boxes and bags (I made those, too).

img_4623

And individual pieces

He used to love to garden and liked his flowers. So we went with this card πŸ™‚

img_4626

And a sweet sentiment for him put on a mug – although I’m not entirely happy with how this came out. It was my first time using oracal 651. It just means I need to play more. Yay!

img_4624

And something fun to wear like a big hug from us πŸ™‚

img_4625

Thanks for stopping by!

xoxo

Links to some items used in the gift set:

Springtime Box CardsΒ  Kit, Age is merely


Social Worker Appreciation Month – Have You Thanked One?

7 03 2018

Social work is a hard and often thankless job. The hours are long and the pay is low, but it’s some of the most important work out there. It takes someone special to do this kind of job.

We have been SO BLESSED to have THE SAME caseworker for the baby’s case the ENTIRE time. If you haven’t been in this world, let me tell you, this is HIGHLY unusual. Our case is almost 2 years old and our worker has been a stabilizing part of it. She made a tough, scary situation easier.

To thank her and show her our appreciation, I made a few things.

Here’s everything together. I made the boxes and bags, too, using my WRMK Template Studio πŸ™‚

Up close of the shirt. I found the saying on Pinterest and designed something in Silhouette Studio to fit my needs. I use Siser glitter HTV in mint and now I think I’m in love with the sparkly htv πŸ™‚

I used the same htv on the mug. Also a saying I found on Pinterest that I put into Silhouette Studio and played around with. I even got to use the conical warp tool!

I used my mug press attachment for the first time and I’m kind of in love with that, too! I do wish I’d made it a little smaller, but it’s a live and learn thing I guess πŸ™‚

The mug says: You can’t fix crazy. All you can do is document it.

This card though.

It should have been easier.

I inked the flower stamp in different colors using a stamp positioning tool. But the effect was a little washed out. I did pick lightish colors though. So I grabbed my markers and inked up select areas of the stamp and stamped again.

I still wasn’t happy, so I got out my prismacolor pencils and added details and colors by hand until I was happy. And I LOVED how it turned out BUT I felt like there was too much white space. Hence the bricks.

I used my Cameo’s pixscan feature to cut out a mask for the stamped image. Then I ran some paper and a metal die through my Evolution Advanced die cutter to make a brick stencil. I masked off the flower and inked up the background. But it was a little, eh. So I got out my pencils and enhanced the bricks. Then I felt it competed too much with the flower. That’s the image you see right below.

So I did some fussy cutting (one of my least favorite things to do) to rescue the flower. Then used some other metal dies and an embossing folder to come up with what you see below. I was finally happy with it and called it a night. You can see the finished version below the bricked version πŸ™‚

Thanks for stopping by!

Oh, the flowers on the are mine because my husband’s awesome πŸ˜‰

Xoxo


You Were Born Trailing Clouds of Glory

25 02 2018

I’ve LOVED unicorns since I was little. Not the cartoonish ones around today, but the regal, majestic ones.

So when I had the chance to do a shower gift bag for a precious baby girl, I thought unicorns and I’m so glad I did. I’m kind of excited with how things turned out.

Some of that excitement comes from trying new things and realizing those ideas worked πŸ™‚ Like modifying bag designs, digitizing hand lettering, and playing with glitter HTV πŸ˜€

Also, babies. Those little bundles are pretty exciting. I love holding and snuggling them. There’s something miraculous about a new born. Something heavenly. So I also included some William Wordsworth words (the trails of glory).

This post is kind of picture intensive, but there were quite a few things.

Ready? Let’s go πŸ™‚

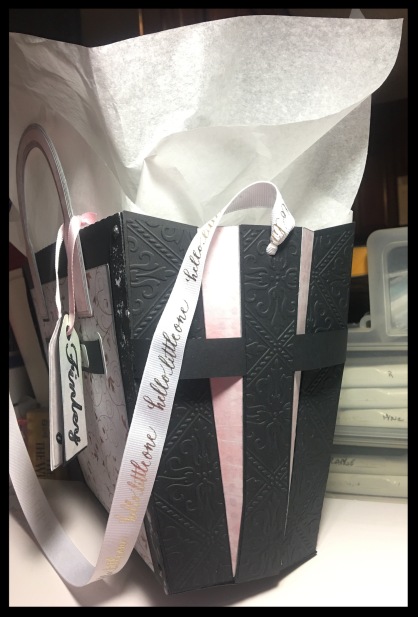
I like giving mommy gifts. Those usually consist of thank you cards. But recently, I’ve been going nuts with vinyl, so I included that insanity in the gift as well. But I had to figure out how to package it all. So here’s what the gift looked like packed up.

img_4314

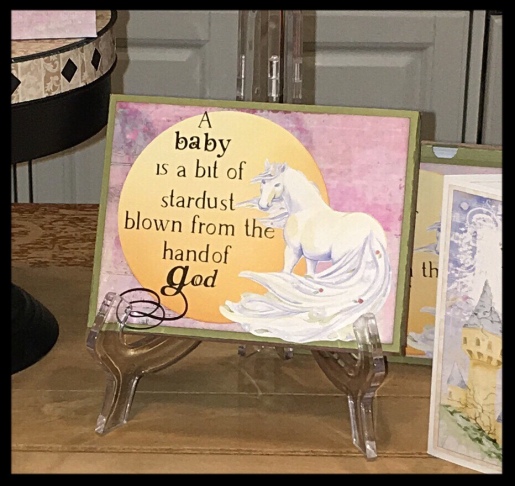
I made the bag, using a design from SVG Cuts that I altered to fit my needs – that was the first thing that excited me. It worked πŸ™‚ Obviously, the bag and mom’s card coordinated. But I wanted the unicorn on the bag to be a little more dramatic than the one on the card. To do this, I used my prisma color pencils to define and enhance some of the shading.

Here’s the next exciting thing. The words on the card front are from William Wordsworth, but the lettering is mine. See?

img_4317

I scanned it into the computer and into my Silhouette Design software where I could clean it up. I’ve been practicing my hand lettering for 5-6 months now. I haven’t perfected it, but it’s fun to play with. After I cleaned the lettering up, I used it in my Craft Artist 2 software where I created the card above.

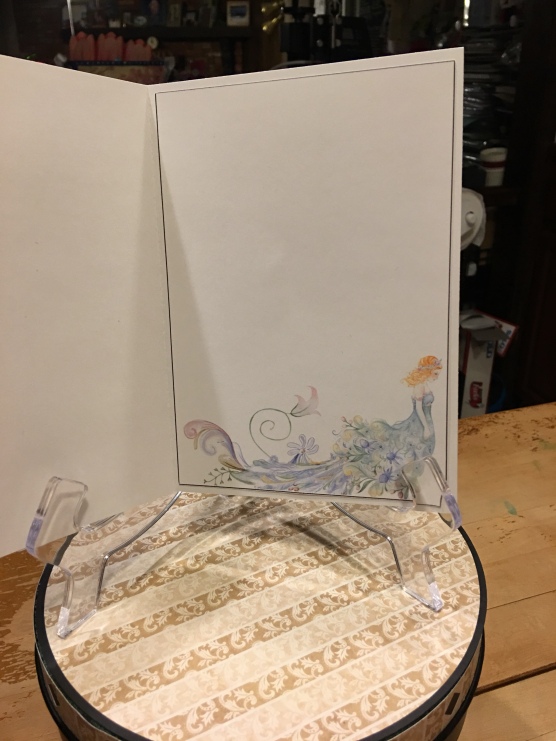
This is the inside of the card. I rarely decorate the inside, but this one just seemed so fitting. This was mom’s card. It was a 5 x 7.

img_4309

I duplicated these cards and made a dozen 4.25 x 5.5 size cards for the new mom to use as thank you cards. I transferred the card design into my silhouette workspace and really made my print & cut feature work. But those cards needed a box…so I made one. Or two. Each box held 6 cards and their envelopes comfortably.

img_4318

The saying is one I found in a book but had no author’s name attached to it.

So now, I have two sayings. I also happen to have two 0-3 month onsies just waiting to be vinyled. So, using the hand lettered saying, and the one I found for the front of the card box (I used vinyl on that, as well) I played with some red glitter heat transfer vinyl…it’s amazing. It looks like someone skinned Dorothy’s ruby red slippers and made HTV out of it it was so sparkly.

Here’s how the onsies turned out.

img_4312-1

Now I had onsies just kind of floating around in the bag. It was not cute and this bag was all about cute. So, I found baby themed boxes in the design store that held the onsies perfectly.

img_4310img_4313

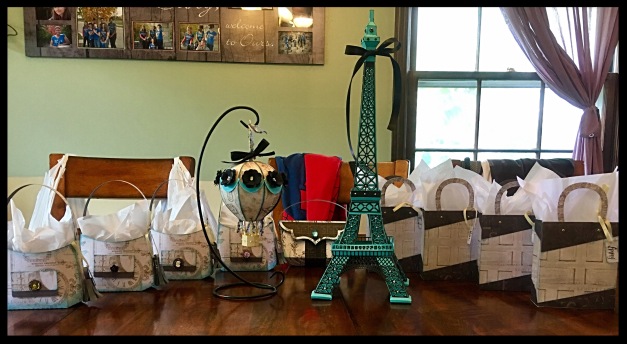
Here’s what it looked like all laid out.

img_4311

Thanks for stopping by!

xoxo

Links to the projects:

Carousel Horse Bag (mine looks like a unicorn bag), Card Box, Onsie Box


Paris Under the Stars Birthday Party

21 10 2017

I’ve beenΒ  working on things for my daughter’s birthday party. It’s finally finished. I’ve shared some of the pieces but not all, and not all together.

Here’s everything together.

img_3229

The tower and Hot Air Balloon together

img_3228

The tower close up

img_3162


The Hot Air Balloon Close Up

img_3227

Bag Close Ups


Links to the projects can be found here: Tower, Hot Air Balloon, Hobo bag and Clutch, Gift Bag


Babies Are Great Excuses to Make Awesome Things!

27 08 2017

Like this bag! I used the same papers I used for their baby shower gifts (you can see that, here and here).

The bag was pretty easy to make (there’s a video tutorial on the site) and seems super sturdy.

img_2916img_2918

I added a little extra to the sides by embossing them because I could πŸ˜‰ Inside was a Royals jumper for the baby and candy for the parents and big sis πŸ™‚

Thanks for stopping by!

xoxo


I Made a Pineapple

20 08 2017

School started Wednesday. It’s a weird mish-mash of schedules now, and I’m not sure how I’m going to make this school year work, but I’m sure it will πŸ™‚

School break down:

3 graduated. Of those 3, 2 are enrolled in college classes. All 3 working and sharing a car.

3 in school. They’re spread out over 3 different schools. 2 of the 3 have extra-curricular activities.

1 still at home.

The one I’m most worried about is the little guy who started kindergarten this week. He’s had a rough beginning and that still plays out in cycles in our home. Right now, we’re in one of our good cycles. But change is SO HARD on this kiddo, I’m waiting for us to start spiraling downward again. Maybe he’ll surprise me, like everyone suggests while I’m gearing up for another round of power struggle battles.

In preparation for these rough times on the horizon, I made a paper pineapple box for his teacher. I put a few goodies in it. He has the same teacher two of my other kids had and I’m so grateful πŸ™‚ But I want to show her my gratitude ahead of time while things are good πŸ™‚

Here’s some pictures of the box.

img_2869img_2871

We got him started in school and that first week went well. Next up is the solar eclipse and we’re in the path of totality, so the schools are teaching around it. My next success will be my boy getting through this amazing event with out burning his retina’s. I think this it totally doable πŸ˜‰

Stamp and Die set, Pineapple


More Baby Shower Cards

29 06 2017

I told you there were a lot. There’s still two more sets I need to work on πŸ˜€

The shower theme is elephants this time. I don’t have that many elephant things to play with, but I did have a file for an elephant book mark, so I started there πŸ™‚

Once I planned it out, I realized I didn’t have any light gray paper and white didn’t look quite right. Because I’m impatient, I used the white anyway and then used my copics to add color to the face. I sponged gray ink on the back and added a few details with my prisma color pencils.

I designed the card in Craft Artist 2, then dragged it into my Silhouette work space for some autotrace work and a print and cut. I sized the elephant book marks to a complimentary size then cut those out, too.

Just for fun, here’s a pic showing the coloring progression for the elephant faces. There were 12 of these guys.

I also made a satchel/purse/bag to hold the cards. I used some of the same colors and paper for this as I did for the cards.

Here’s the finished project.


Thanks for stopping by!

Xoxo

Elephant Bookmark, CA2 Yellow , CA2 gray, Satchel


Babies, Part 2

23 06 2017

Here’s the second set of baby cards. I have to admit, I’m kind of in love with this set. It turned out better than I thought it would πŸ™‚


The designed the card in Craft Artist 2 and imported it into my silhouette work space to do a print & cut. I used my prismacolor pencils to better define the flower.

Here’s the difference he pencils make. I like the added contrast πŸ™‚


For the umbrella bag (this was an adorable design in an Easter kit, but it worked well for this) I added the digital papers I used to design the card into the Patterns folder in my library so my bag coordinated with my cards. I had some extra vinyl left from my Father’s Day project, so I used that instead of paper for baby Finley’s name πŸ™‚

I absolutely love how this project turned out. Hopefully, my sister-in law will, too!

Thanks for stopping by!

Xoxo

CA2 Digital kit, Umbrella bag