That Time I Made Myself Feel Better With Paper

16 07 2022

There’s a lot of sad in the world right now. From world events, to national, to local, and right down to the people in our lives.

And I’m an emotional sponge. I soak in emotions. The easy emotions get released pretty easily. The laughter and smiles, that’s the easy stuff.

The hard ones…those are the emotions I keep in. I hold those close because I don’t WANT to give them to others. I don’t WANT others to feel those same things. So I keep them. I process them. I deal with them.

One of the ways I deal with them is art. But I don’t keep the art. The process and the thought behind the art is where the healing is for me, but that’s not the end of it. The end of that dealing with and healing from comes when I find the person that work belongs to. Sometimes it’s easy, if someone has been on my mind. Sometimes I have to wait and see who comes my way. But every single time I’ve been able to do something like that for someone, that’s really what healed my soul and filled my heart.

My therapist didn’t understand at first when she asked me what I did for ME. The answer is, I make things for someone else. And even if it didn’t fit her idea of what that meant, she realized that it worked for me.

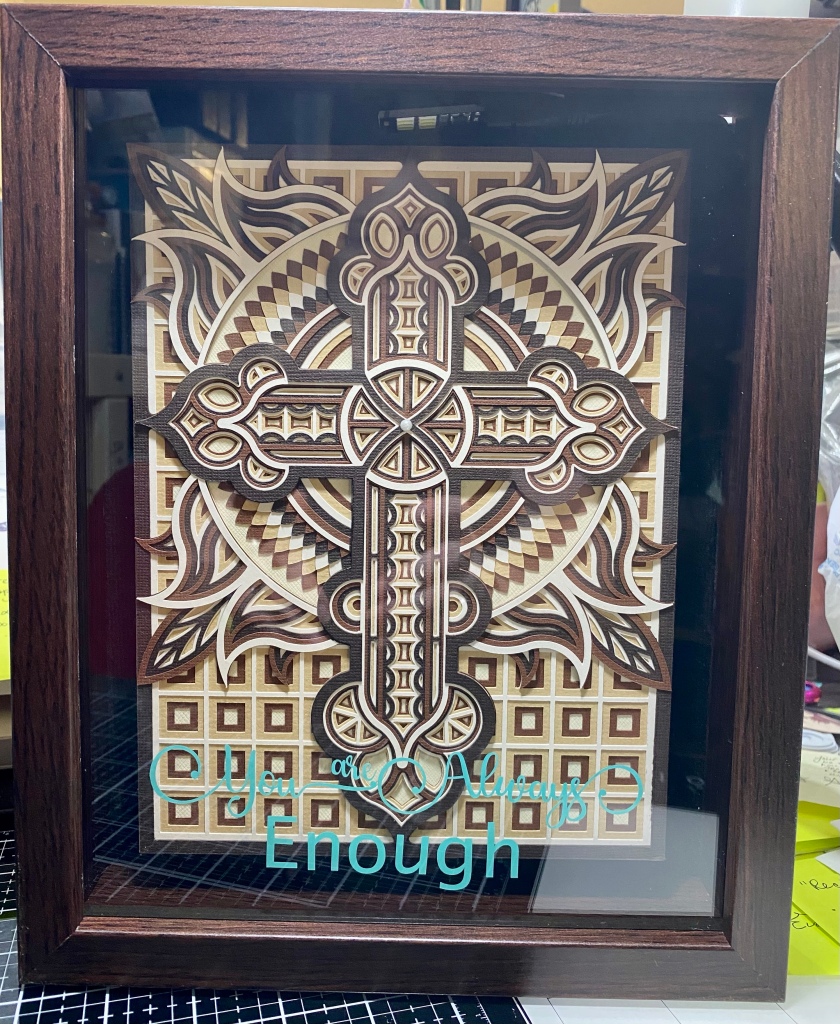
So this last week I spent some time playing with paper because I needed to feel better. And I had a very specific project in mind. I needed the message it created. It didn’t come out exactly like I hoped, but I use the good stuff and once it was in place, that was it, lol.

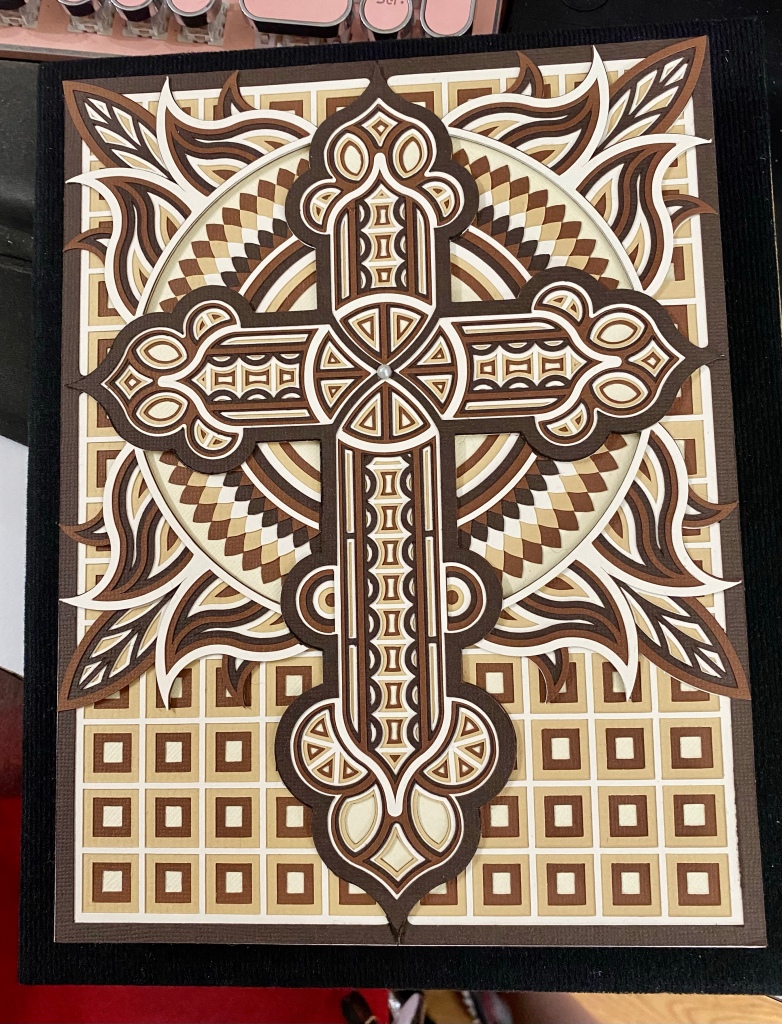
The design took eight layers of paper to complete. I fell in love with the design right off the bat, and I absolutely love the colors and how they came out. It was tricky trying to get it to look like I wanted it to in the shadow box, but I got it figured out. The only part I’m not too keen on is the wording. I needed to use a lighter color of vinyl, but like I said, this stuff isn’t coming off easily lol.

Anyway, the words say, “You are Always Enough” I just wish I’d done it in white 🙂
Here it is, out of the shadow box, which takes the glare off of it. The designer did a beautiful job and this file was so nice to work with 🙂
Thanks for stopping by! We’re happy to see you 🙂

XOXOXO

Alta


I Made a Thing!

27 07 2018

Holy cow! No posts for like a month+ and now there’s two! And this post is about a 3D project!

If you don’t know – I LOVE 3D paper projects. But they take more time than cards, and I just don’t have a ton of time these days. But for my parents, I stayed up until 3am working on this and I love how it turned out.

We just wrapped up an annual reunion. The tradition is about 30 years old. Each family (there are 10 kids in my mom’s family) takes turns hosting and planning. This year, it was my parents’ turn. It’s a lot of hard work and I wanted something special to thank them with. So I made this and filled it with chocolate 🙂 And yes, they are avid RV-ers, so this was perfect for them 🙂 The file is from SVG Cuts.


Camper 1Camper 2Camper 3


If At First You Don’t Succeed…

5 08 2017

Some days I make something and look at the finished project and I’m happy with it. Some days, I’m shocked because it turned out better than I hoped. Those are the times I sit back and say, “I can’t believe that worked.”

This week, there were no days like that. I feel like I struggled for every card I finished – and I only finished three of them. I’m not even posting one of them. I know if I force a project and it’s just not my “thing,” I hit walls like this. But that wasn’t the problem this time. But I also know, that I need to push through those walls. Sometimes pushing through leads to ideas I’d never have thought of, and they worked.

This week, there were no days like that, either.

But I thought I’d share, and even show some of the things that just weren’t working for me.

First up, is the happiness card.

img_2792

I designed the strip along the side in Craft Artist 2 (so sad they’re not around anymore) using a combination of paper layering and then stenciling (all digital). Once I had what I wanted, I exported the pieces and dragged them onto my Silhouette work space. I used a saying that I love, but up until now haven’t figured out a place to use it. I’m still not sure how I feel about using it here, but it’s done 🙂

The challenge here was finding the best way to transfer all those letters onto the card in one piece – I don’t enjoy lining up letters and words just right, it takes too long and I could be doing something fun, like coloring 😉

So the answer I came up with was matting the words. This worked great. I created the mat for the saying using the Offset feature then filled it in with black. It wasn’t quite what I was going for – the letters and words weren’t as connected as I wanted them to be – so I did another offset.

It looked great but cut terribly.

After printing the elements I needed, I loaded my paper into my Cameo. Instead of doing one cut to cut out the exterior mat, it tried to cut out everything. I tried over and over to get it to do what I wanted. Finally, on like the 5th try, a light bulb went off over my head. And in case someone else finds this helpful, I’m going to share that light bulb moment.

When using the offset function, you’re essentially creating another layer. I typically group those layers so I can move them around my workspace easier. Now, remember how I wanted that third mat/layer? I selected my grouped item and used the offset function. What I didn’t realize, was that it was creating a mat for BOTH layers. When I went to cut it, it wasn’t cutting how I thought I’d designed it. THE FIX – ungroup them, “unstack” them, select ONLY the mat that was just created, and offset just the mat. After I had all my pieces done, I layered them, centered them, grouped them, and printed the saying (again), then FINALLY, SUCCESSFULLY cut that thing out how I wanted it.

So here’s the next card.

img_2790

Once again, I designed the background in Craft Artist and got it into my Silhouette work space. I added a sentiment I found in the Silhouette Design store and then added a bird on a branch silhouette (I’m sure you’ve noticed, there is no bird on a branch on this card). I actually tried two or three different bird on a branch silhouettes. The plan was to add the details in and color it – like I’ve done with so many other projects.

It didn’t work.

New idea.

Use one of the stamp and metal die sets to find something that worked – a humming bird fit what I was trying to do. I colored it – and I was happy with how it turned out. Then I lined the image and the metal die up, taped things down and ran it through my die cutting machine. I went to remove it and realized my die slipped at some point and it didn’t cut the image correctly. I stamped and colored again, then lined up everything, added extra tape this time to keep things in place and it FINALLY worked. I put that bad boy together and declared the card done.

Here’s a picture of the card with some of the things that didn’t work. There were more things, but I’d already thrown them away.

img_2791

I hope you had a better week doing whatever it is you do.

Thanks for stopping by!

xoxo

Thank you, Butterfly saying, stamp and die set, bird I didn’t use


Fairy Cottage

3 02 2017

fairy-house-for-posting-2Have I mentioned how much I love 3D?

Here’s another house. I’ve made this one before, but decorated differently because I was doing a winter theme. With this one, I’m trying to urge spring to get here quicker 🙂

This and the Victorian House in the previous post, and another house posted further down are for a silent auction at my kids’ school. It will be interesting to see what the interest in something like this is. This is an SVG Cuts file and you can find all the fun here.

Thanks for stopping by

xoxox